
A real time clock is basically just like a watch - it runs on a battery and keeps time for you even when there is a power outage! Using an RTC, you can keep track of long timelines, even if you reprogram your microcontroller or disconnect it from USB or a power plug.
Most microcontrollers, including the Arduino have a built-in timekeeper called millis() and theres also timers built into the chip that can keep track of longer time periods like minutes or days. So why would you want to have a seperate RTC chip? Well, the biggest reason is that millis() only keeps track of time since the Arduino was last powered - that means that when the power is turned on, the millisecond timer is set back to 0. The Arduino doesnt know its 'Tuesday' or 'March 8th' all it can tell is 'Its been 14,000 milliseconds since I was last turned on'.
OK so what if you wanted to set the time on the Arduino? You'd have to program in the date and time and you could have it count from that point on. But if it lost power, you'd have to reset the time. Much like very cheap alarm clocks: every time they lose power they blink
While this sort of basic timekeeping is OK for some projects, some projects such as data-loggers, clocks, etc will need to have consistant timekeeping that doesnt reset when the Arduino battery dies or is reprogrammed. Thus, we include a seperate RTC! The RTC chip is a specialized chip that just keeps track of time. It can count leap-years and knows how many days are in a month, but it doesn't take care of Daylight Savings Time (because it changes from place to place)

This image shows a computer motherboard with a Real Time Clock called the DS1387. Theres a lithium battery in there which is why its so big.
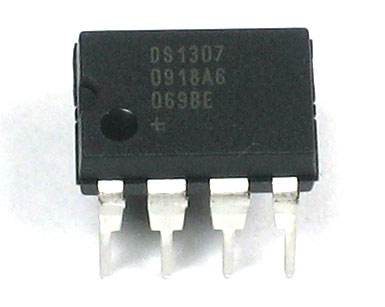
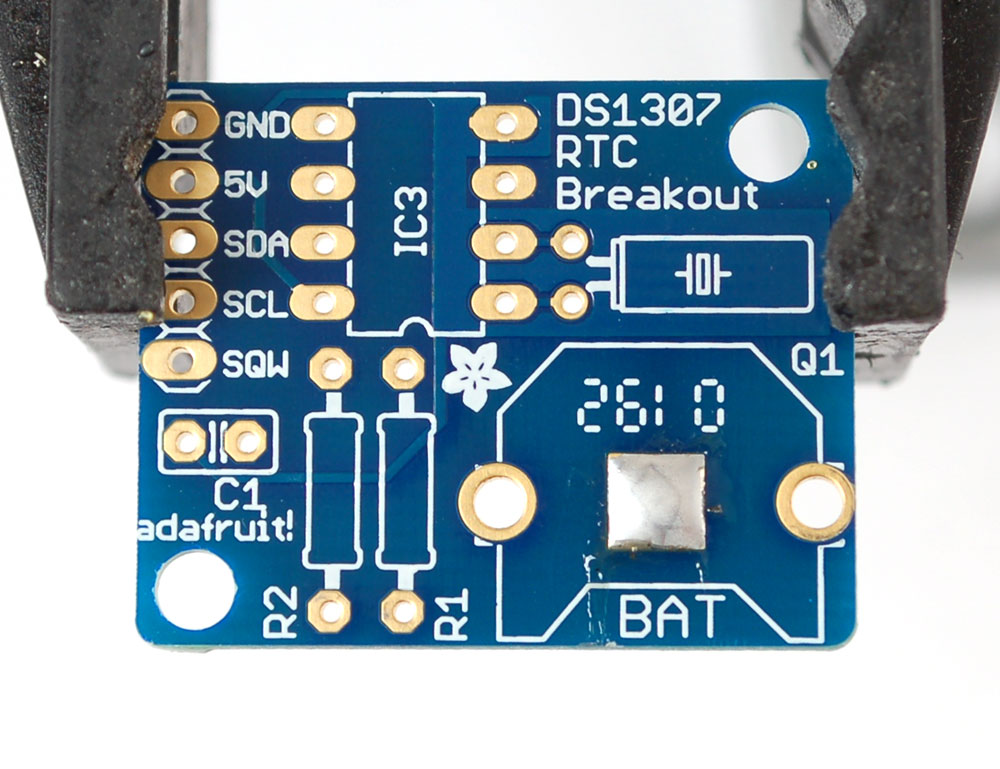
The RTC we'll be using is the DS1307. It's low cost, easy to solder, and can run for years on a very small coin cell.
As long as it has a coin cell to run it, the DS1307 will merrily tick along for a long time, even when the Arduino loses power, or is reprogrammed.
You MUST have a coin cell installed for the RTC to work, if there is no coin cell, it will act strangly and possibly hang the Arduino so ALWAYS make SURE there's a battery installed, even if its a dead battery.
Image |
Name |
Description |
Part information |
Qty |
|||||||
|---|---|---|---|---|---|---|---|---|---|---|---|
|
IC2 |
Real time clock | DS1307 | 1 |
|||||||
 |
Q1 |
32.768 KHz, 12.5 pF watch crystal | 1 |
||||||||
|
R1, R2 | 1/4W 5% 2.2K resistor Red, Red, Red, Gold |
Generic | 2 |
|||||||
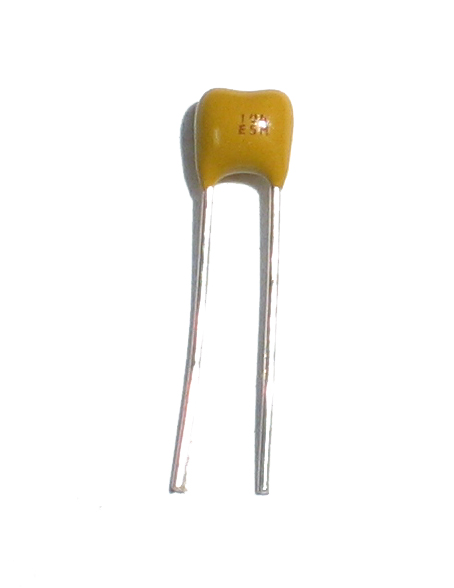 |
C1 | 0.1uF ceramic capacitor (104) |
Generic | 1 |
|||||||
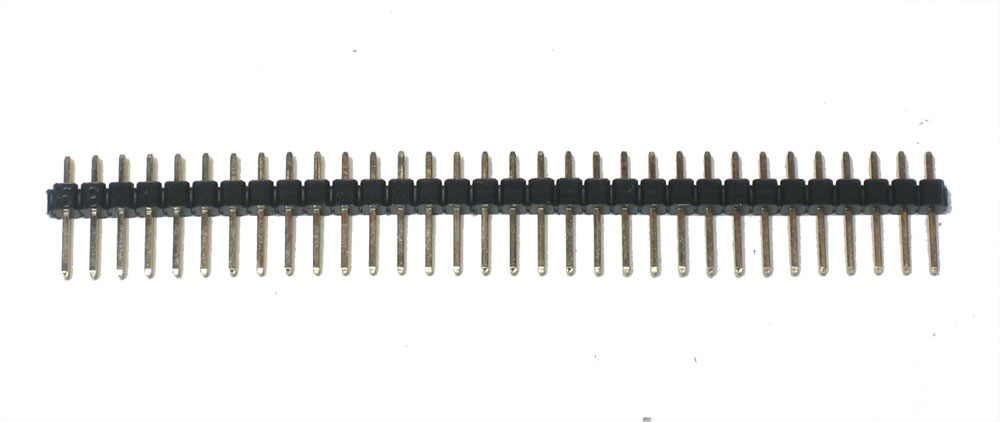 |
5 pin male header (1x5) | Generic | 1
|
||||||||
 |
BATT |
12mm 3V lithium coin cell | 1 |
||||||||
 |
BATT' |
12mm coin cell holder | 1 |
||||||||
|
PCB |
Circuit board |
1 |


 |
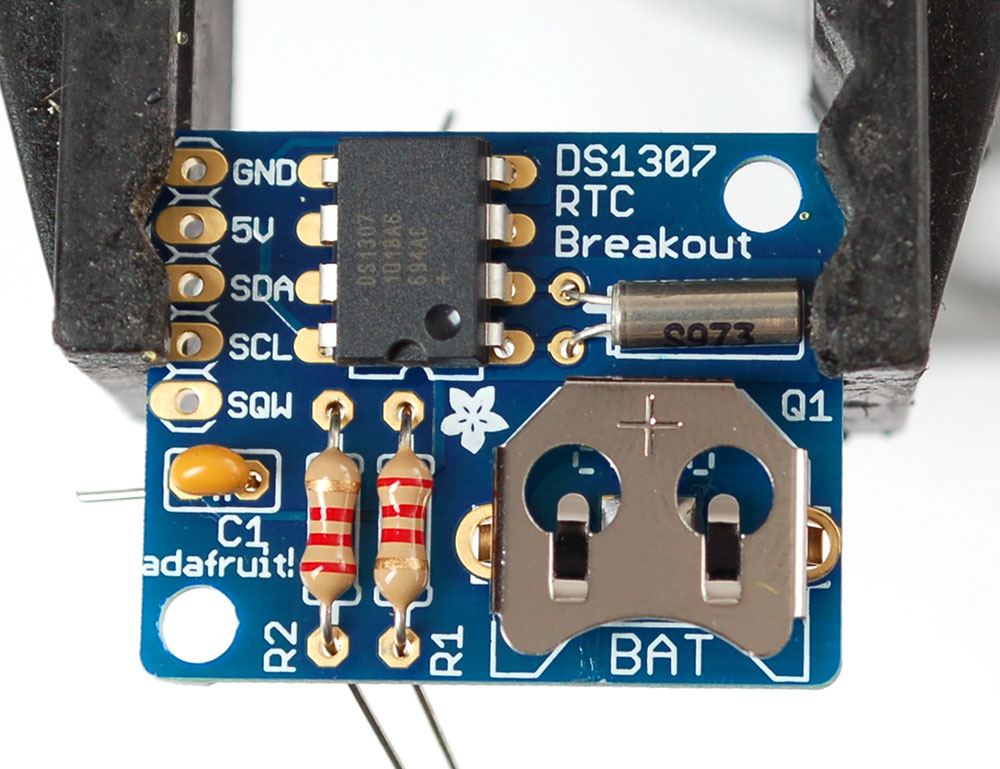
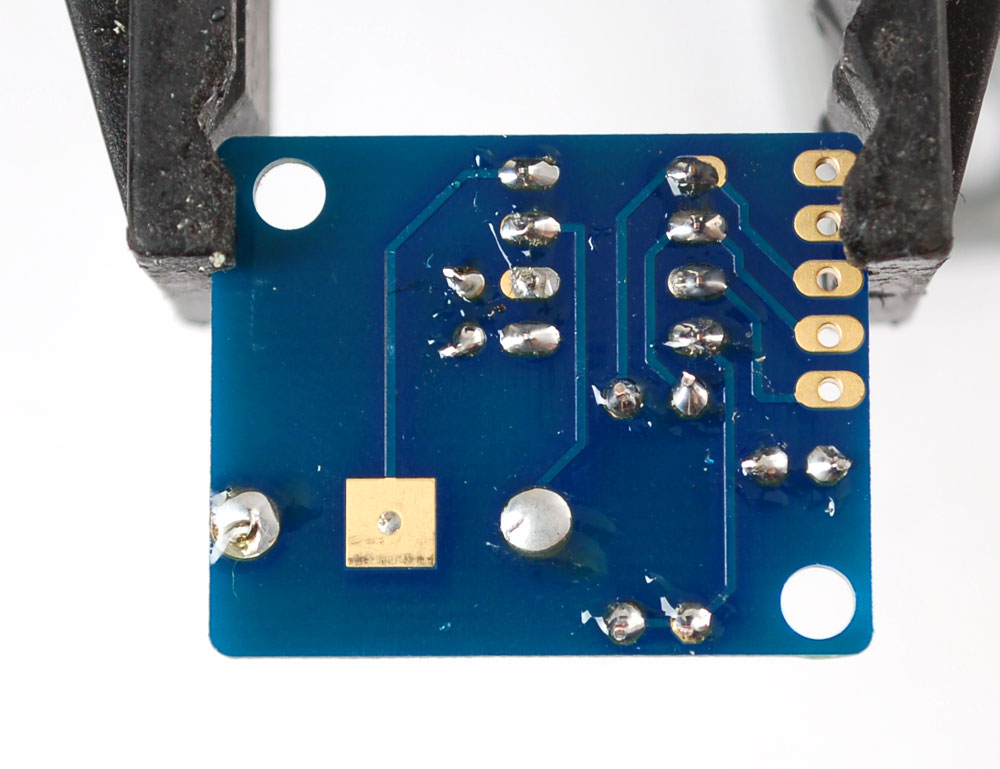
Prepare to assemble the kit by checking the parts list and verifying you have everything! Next, heat up your soldering iron and clear off your desk. Place the circuit board in a vise so that you can easily work on it |
|
Begin by soldering a small bump onto the negative pad of the battery: this will make better contact! |
|
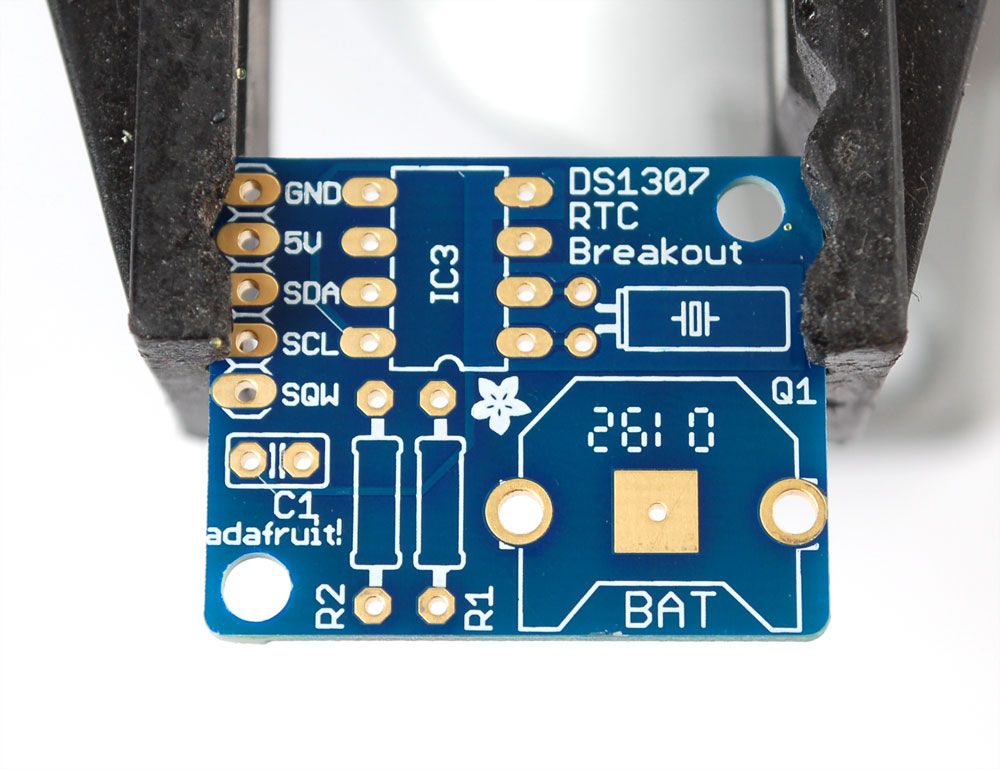
place the two 2.2K resistors, and the ceramic capacitor. They are symmetric so no need to worry about direction. Then place the crystal (also symmetric), the battery holder (goes on so that the battery can slip in the side) and the RTC chip. The RTC chip must be placed so that the notch/dot on the end match the silkscreen. Look at the photo on the left, the notch is pointing down. Double check this before soldering in the chip because its quite hard to undo! |
|
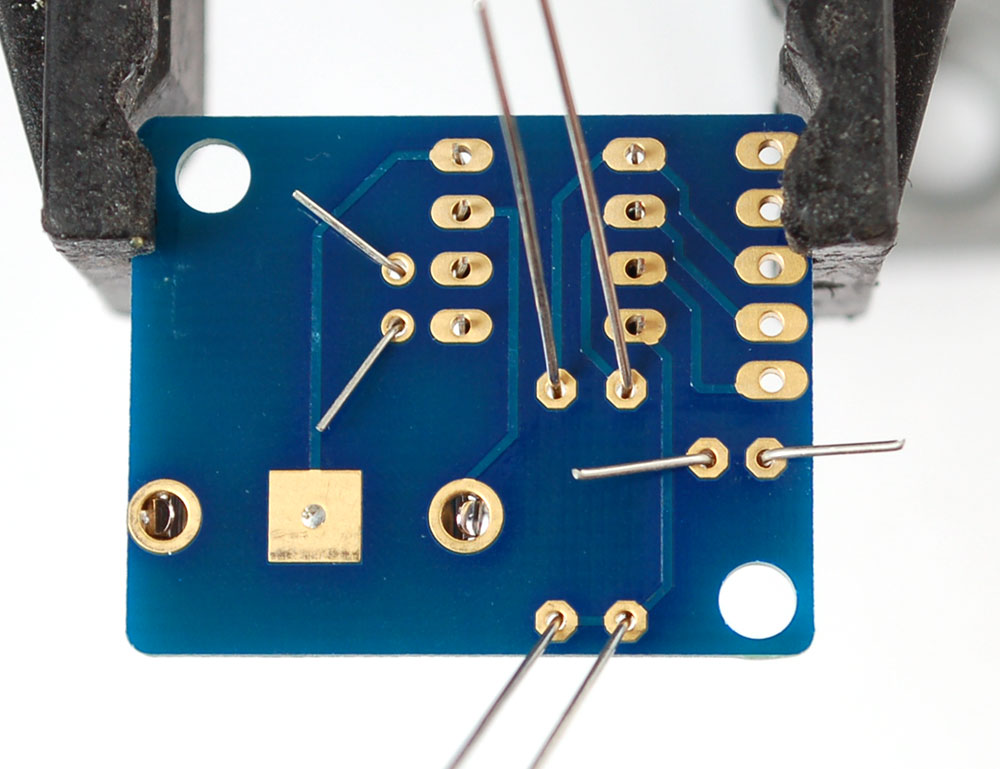
To keep the battery holder from falling out, you may want to 'tack' solder it from the top Then flip over the board and solder all the pins. |
|
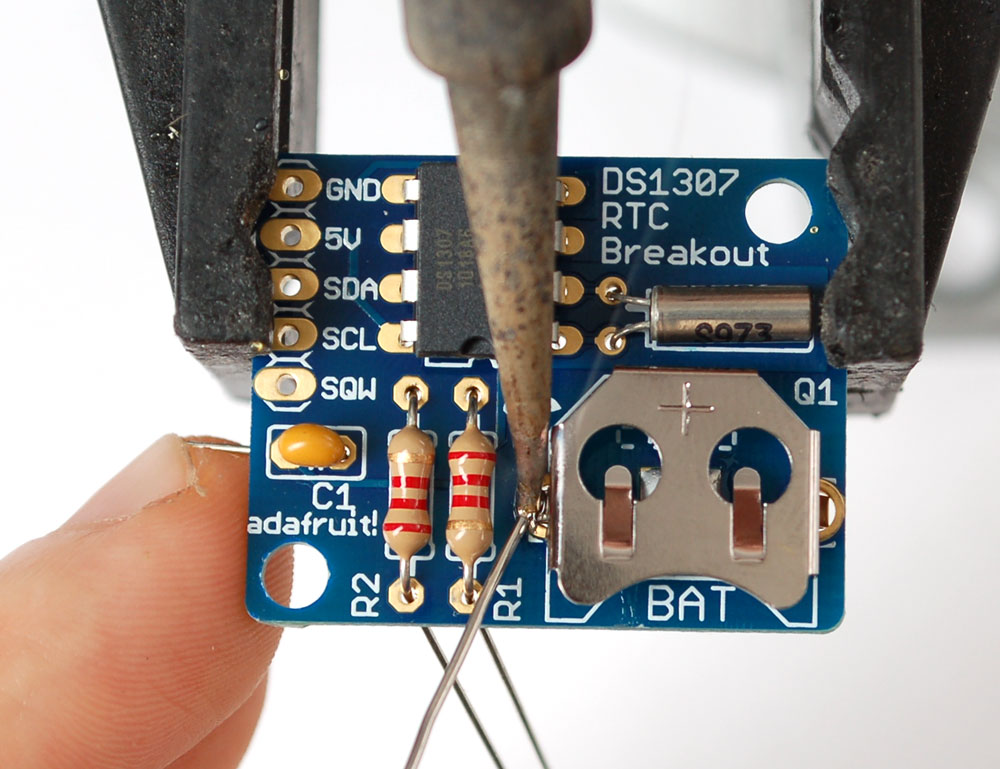
Clip the leads of the resistors, crystal and capacitor short. |
If you'd like to use the header to plug the breakout board into something, place the header in a breadboard, long side down and place the board so that the short pins stick thru the pads. Solder them in place. |
|
 |
Insert the battery so that the flat + side is UP. The battery will last for many years, 5 or more, so no need to ever remove or replace it. You MUST have a coin cell installed for the RTC to work, if there is no coin cell, it will act strangly and possibly hang the Arduino so ALWAYS make SURE there's a battery installed, even if its a dead battery. |


Any 5V microcontroller with I2C built-in can easily use the DS1307. We will demonstrate how to use it with an Arduino since it is a popular microcontroller platform.
For the RTC library, we'll be using a fork of JeeLab's excellent RTC library RTClib - a library for getting and setting time from a DS1307 (originally written by JeeLab, our version is slightly different so please only use ours to make sure its compatible!) - download the .zip by clicking on Download Source (top right) and rename the uncompressed folder RTClib Then install it in your Arduino directory in a folder called RTClib
There are only 5 pins: 5V GND SCL SDA SQW.
- 5V is used to power to the RTC chip when you want to query it for the time. If there is no 5V signal, the chip goes to sleep using the coin cell for backup.
- GND is common ground and is required
- SCL is the i2c clock pin - its required to talk to the RTC
- SDA is the i2c data pin - its required to talk to the RTC
- SQW is the optional square-wave output you can get from the RTC if you have configured it to do so. Most people don't need or use this pin

If you set analog pin 3 (digital 17) to an OUTPUT and HIGH and analog pin 2 (digital 16) to an OUTPUT and LOW you can power the RTC directly from the pins!

The first thing we'll demonstrate is a test sketch that will read the time from the RTC once a second. We'll also show what happens if you remove the battery and replace it since that causes the RTC to halt. So to start, remove the battery from the holder while the Arduino is not powered or plugged into USB. Wait 3 seconds and then replace the battery. This resets the RTC chip. Now load up the following sketch (which is also found in Examples->RTClib->ds1307) and upload it to your Arduino with the datalogger shield on!
// Date and time functions using a DS1307 RTC connected via I2C and Wire lib

#include <Wire.h>
#include "RTClib.h"

RTC_DS1307 RTC;

void setup () {
    Serial.begin(57600);
    Wire.begin();
    RTC.begin();

  if (! RTC.isrunning()) {
    Serial.println("RTC is NOT running!");
    // following line sets the RTC to the date & time this sketch was compiled
    //RTC.adjust(DateTime(__DATE__, __TIME__));
  }

}

void loop () {
    DateTime now = RTC.now();

    Serial.print(now.year(), DEC);
    Serial.print('/');
    Serial.print(now.month(), DEC);
    Serial.print('/');
    Serial.print(now.day(), DEC);
    Serial.print(' ');
    Serial.print(now.hour(), DEC);
    Serial.print(':');
    Serial.print(now.minute(), DEC);
    Serial.print(':');
    Serial.print(now.second(), DEC);
    Serial.println();

    Serial.print(" since 1970 = ");
    Serial.print(now.unixtime());
    Serial.print("s = ");
    Serial.print(now.unixtime() / 86400L);
    Serial.println("d");

    // calculate a date which is 7 days and 30 seconds into the future
    DateTime future (now.get() + 7 * 86400L + 30);

    Serial.print(" now + 7d + 30s: ");
    Serial.print(future.year(), DEC);
    Serial.print('/');
    Serial.print(future.month(), DEC);
    Serial.print('/');
    Serial.print(future.day(), DEC);
    Serial.print(' ');
    Serial.print(future.hour(), DEC);
    Serial.print(':');
    Serial.print(future.minute(), DEC);
    Serial.print(':');
    Serial.print(future.second(), DEC);
    Serial.println();

    Serial.println();
    delay(3000);
}
Now run the Serial terminal
and make sure the baud rate is set correctly at 57600
bps
you should see the following:

Whenever the RTC chip loses all power (including the backup battery) it will report the time as 0:0:0 and it won't count seconds (its stopped). Whenever you set the time, this will kickstart the clock ticking. So basically the upshot here is that you should never ever remove the battery once you've set the time. You shouldn't have to and the battery holder is very snug so unless the board is crushed, the battery wont 'fall out'
With the same sketch loaded, uncomment the line that starts with RTC.adjust like so:
  // following line sets the RTC to the date & time this sketch was compiled
  RTC.adjust(DateTime(__DATE__, __TIME__));
This line is very cute, what it does is take the Date and Time according the computer you're using (right when you compile the code) and uses that to program the RTC. If your computer time is not set right you should fix that first. Then you must press the Upload button to compile and then immediately upload. If you compile and then upload later, the clock will be off by that amount of time.
Then open up the Serial monitor window to show that the time has been set

From now on, you wont have to ever set the time again: the battery will last 5 or more years
Now that the RTC is merrily ticking away, we'll want to query it for the time. Lets look at the sketch again to see how this is done
void loop () {
    DateTime now = RTC.now();

    Serial.print(now.year(), DEC);
    Serial.print('/');
    Serial.print(now.month(), DEC);
    Serial.print('/');
    Serial.print(now.day(), DEC);
    Serial.print(' ');
    Serial.print(now.hour(), DEC);
    Serial.print(':');
    Serial.print(now.minute(), DEC);
    Serial.print(':');
    Serial.print(now.second(), DEC);
    Serial.println();
There's pretty much only one way to get the time using the RTClib, which is to call now(), a function that returns a DateTime object that describes the year, month, day, hour, minute and second when you called now().
There are some RTC libraries that instead have you call something like RTC.year() and RTC.hour() to get the current year and hour. However, there's one problem where if you happen to ask for the minute right at 3:14:59 just before the next minute rolls over, and then the second right after the minute rolls over (so at 3:15:00) you'll see the time as 3:14:00 which is a minute off. If you did it the other way around you could get 3:15:59 - so one minute off in the other direction.
Because this is not an especially unlikely occurance - particularly if you're querying the time pretty often - we take a 'snapshot' of the time from the RTC all at once and then we can pull it apart into day() or second() as seen above. Its a tiny bit more effort but we think its worth it to avoid mistakes!
We can also get a 'timestamp' out of the DateTime object by calling get which counts the number of seconds (not counting leapseconds) since midnight, January 1st 2000
    Serial.print(" since 2000 = ");
    Serial.print(now.get());
    Serial.print("s = ");
    Serial.print(now.get() / 86400L);
    Serial.println("d");
Since there are 60*60*24 = 86400 seconds in a day, we can easily count days since then as well. This might be useful when you want to keep track of how much time has passed since the last query, making some math a lot easier (like checking if its been 5 minutes later, just see if get() has increased by 300, you dont have to worry about hour changes)