This is an old revision of the document!
Table of Contents
Make your own cable
The kh930e is designed to work with a Tandy PDD1 floppy drive. We don't need it! Make your own cable to communicate between your computer and the machine. You will need:
- FTDI cable - you should be able to use a '3.3v' or '5v' cable.
- 2x4 connector part number WM8036-ND on Digikey
You will need to make some minor mods to get the cable talking to your knitting machine. Follow the tutorials to get your knitting cable going
Change 'polarity' of the FTDI cable
FTDI cables have standard 'inverted' TTL (zero is 3-5V and one is 0v) but the KH930E requires the opposite. Luckily its very easy to fix this by reprogramming the software.
You will need a copy of FTDI MProg (windows only) and your FTDI cable. Plug in the FTDI cable into your windows computer and install the driver that matches your computer best
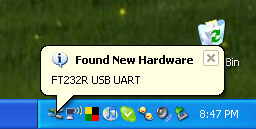
Please read our detailed tutorial on installing the driver here then come back when the driver is installed
Now download FTDI MProg and run the program

Select Scan… from the menu

The message window should say it found a cable

Now select Read and Parse to read in the cable programming


Click the buttons that say to Invert TX and RX

Here is the wierd thing, you have to Save as… the settings so just save it anywhere

Now you can click the Program button (lightening bolt)

The message window will say it programmed

You're done! Quit Mprog
Rewire the connector
Next we need to rewire the FTDI cable to match the pinout of the knitter. The cable comes with a 1x5 connector, but we need a 2x4 connector

Use tweezers to lift up the black connector tabs

Then gently pull out the wire


Repeat for all the wires.
You'll want to cut away a few inches of the black cable sheathing so you have plenty of 'space' to work with the wires. Cut down the sheathing without cutting the colored wires, use a fine scissors. Cut 1 or 2" away.
Now grab the 2x8 cable connector you bought from Digikey or whatever. You'll need to insert the wires so that they snap into the connector to match the following diagram. Do not insert the red or green wires yet!!! Insert just the orange and yellow wires. Look at the photos below to make sure you have the wires in the right order, they should just snap in. If they don't snap make sure the little lock-tab is facing 'out'

Next is the one tough part, you'll want to cut the green wire as close to the black sheathing. Then cut the red wire about in the middle and solder both green and red wires to the red wire so that you have two wire connections. See the following image


You're done!

