This text is for the old kit version, the new tutorial for the assembled shield has moved to http://learn.adafruit.com/adafruit-data-logger-shield
This page will run through the schematic, explaining whats going on and why picked the parts we did!
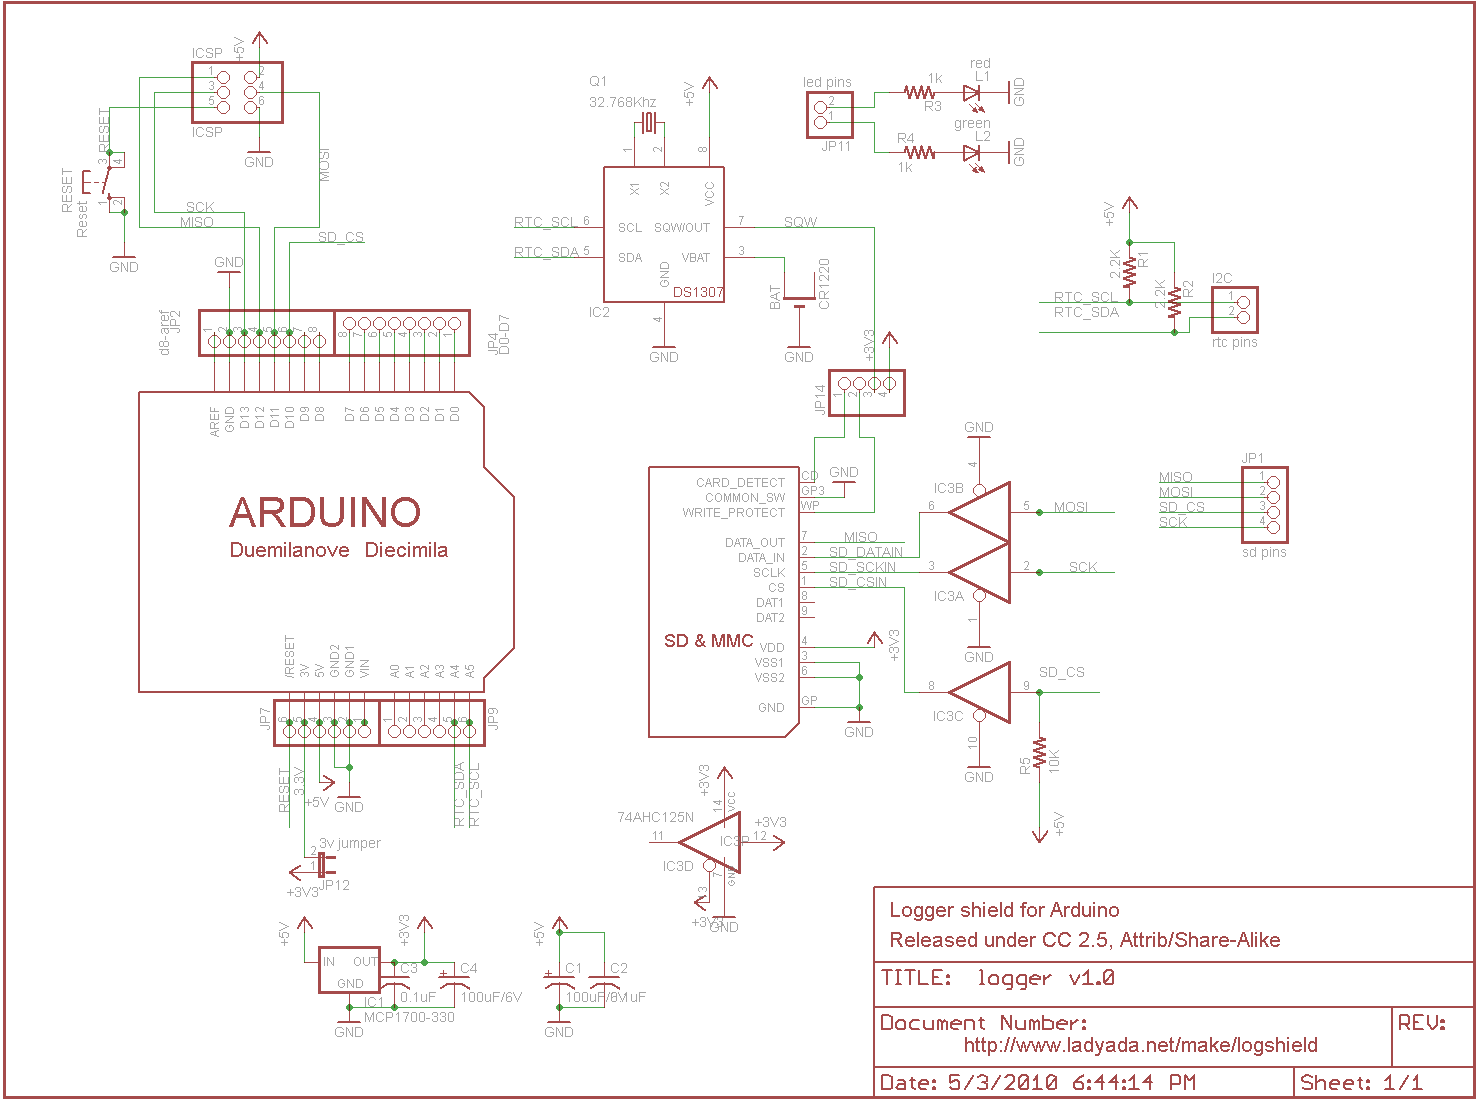
Here's the 'big picture' schematic for reference


There is a small power supply on the board for generating 3.3V @ 250mA. We don't use the 'built in' 3.3v regulator on the Arduino because its only guaranteed up to 50mA and some SD card need a lot of power when writing. This supply is nice and steady, we can use it as an analog reference too! We have two sets of bypass caps to try and keep both 5V and 3.3V supply nice and clean - the 100uF ones are for the low frequency noise and 0.1 for higher frequency

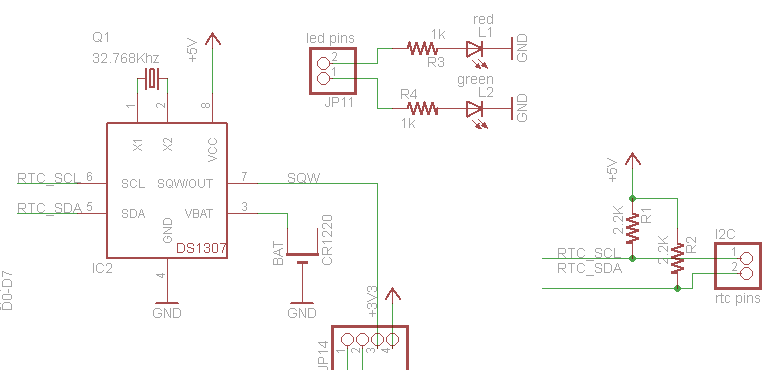
The real time clock is the DS1307 from Maxim, which has a battery backup (CR1220) and communicates with the Arduino via i2c (the SCL and SDA lines). i2c requires pullup resistors on the clock and data lines, which you see as R1 and R2. 2.2K are good values, but if you're in a bind, 1.0K to 10K will probably work fine.
The RTC requires a single 12.5pF load crystal at 32.768 KHz, Q1 - this is how it keeps time
There are also two LEDs for general purpose blinkin' - we like to use them to tell when the SD card is being written to.

The SD card holder is connected to the Arduino through a buffer IC3. The buffer is a level shifter, converting the 5V signals into 3.3V ones which are safe to use. (For some cards its OK to use 5V signals but you risk the card being permanently damaged!) There is a pull up on the CS line so that if you program the Arduino with a ISP programmer while theres a card in, you wont scramble it.
There are two 'unused' lines from the SD card - Card Detect is shorted to ground when a card is inserted. Write Protect is shorted to ground when a card with the safety switch flipped is inserted.

Finally we have the arduino interface. The Datalogger shield uses 6 pins. Analog 4 and 5 are the i2c hardware pins. The SD card uses Digital pins 13, 12, 11, and 10. The first three are pretty much required. If you really need pin 10, you can edit the library header file and change it from pin 10 to any other pin. BUT you must have pin 10 as an output, if its an input, the SD interface wont work (its a really annoying thing about AVRs - not sure why this is). A standard 6 pin ISP header is available in case you want to program the Arduino with code using a stand-alone programmer
There is also a RESET button, handy when you want to start the Arduino over!
