Table of Contents
Hi everybody, this is Ladyada speaking! So far, I've been writing pretty much all the tutorials on the site but I'd like to introduce someone who is going to be doing some really really awesome EL projects and tutorials. First off is a fun costume project to make a pair of glowing-edged luna wings using EL wire!
Take it away, Branden!
Introduction
I have always loved making things. This came fairly naturally since my parents are both supreme makers in their own right. Afer all they taught themselves how to do lost-wax casting so they could make their own wedding rings! Over the last decade though, I've done most of my creating with 1s and 0s - lots of software and some generative art, but not many physical objects. That started to change when I got my hands on Issue #1 of Make magazine.
In the years since then I've aquired the makings of a halfway decent wood shop and electronics bench, but mostly I've just tinkered. I've learned a lot and had quite a bit of fun, but haven't produced many finished projects. I was aquiring the skills, but hadn't found that proverbial "itch" to scratch.
That changed in 2011 when my wife and I decided to celebrate our 10th anniversary by attending Burning Man. Being that it's held in the middle of the desert, it gets really dark out there at night. Because of this it's very important to be lit up so that you're visible to the other people, cyclists and vehicles. So there was my muse - I wanted to make something for my wife that lit up, was easy to wear, and looked cool. How about some EL wire wings?
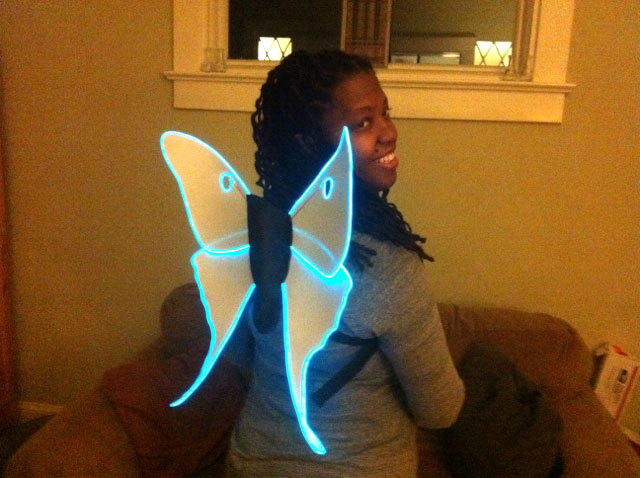
The first wings I made were cartoon-y butteryfly wings, but since then I've moved on to these more elegant luna moth wings. Read on to learn how to make your own
What you'll need!
- ~5m of EL wire, copper tape and driver(s). I used two Adafruit Aqua EL wire starter kits.Each pack comes with 2.5 meters, splicing parts like copper tape and heat shrink, and an inverter
- AA batteries to run the inverters
- 4 x 12" x 18" craft foam sheets (2mm thickness) - you'll want in two white and in two black - available at any craft or stationary shop
- 3 yards of 1" canvas strap (I used black)available at any craft, hardware or sewing supply shop
- 4 x 1" D-rings- available at any craft, hardware, or sewing supply shop
- Cyanoacrylate glue "Super Glue" (I used two 4g containers)- available at any craft or hardware store
- A few feet of thin two-conductor stranded wire (I used speaker wire)- you can get this at a hardware store
- Heat shrink tubing (at least two 1" sections need to be white)- you can get this at a hardware store or use the heat shrink in the start packs
You'll also need tools...
- Basic soldering gear (soldering iron, solder, damp sponge, etc)you will need to cut & solder the EL wire!
- Scissors
- A work surface you don't mind getting glue on - cardboard works well
- Acetone-based nail polish remover for cleaning up any glue mishaps
Cutting the craft foam

The very first step is to download and print this PDF pattern for the wings. You'll need to cut out the shape on each page and then align and tape together the shapes from pages 1 and 2 to make the full pattern for the bottom half of the wing.
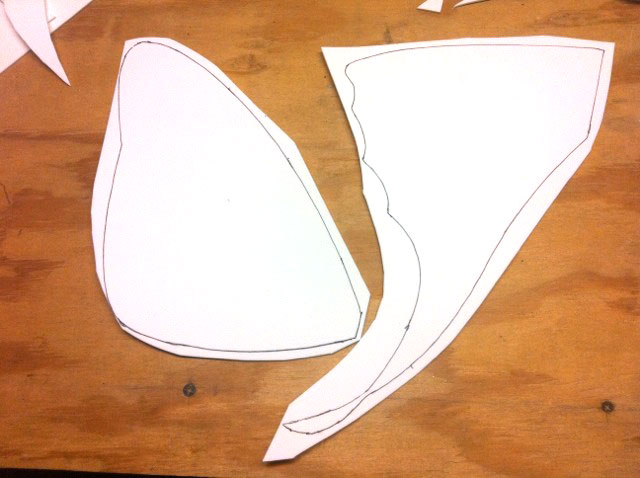
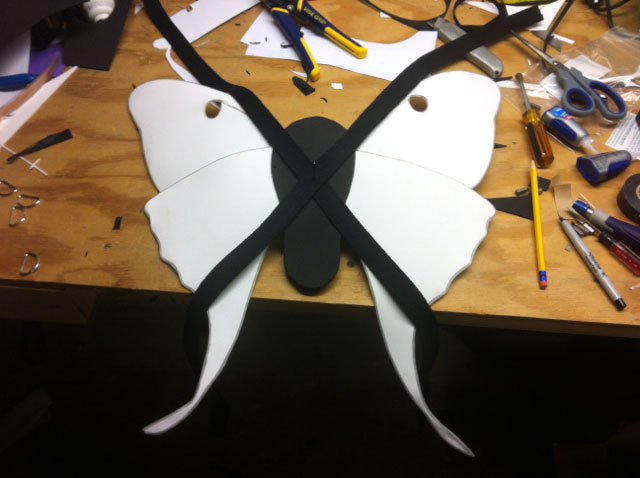
Once you have the patterns cut out, trace the wing patterns onto your white craft foam and cut out two of top wings and two of the bottom wings. The "eye" on the top wing is entirely optional, you don't have to cut it out unless you plan on adding them to the final wings. You will also need to cut out three copies of the body from the black craft foam.
Cutting & Gluing the EL Wire
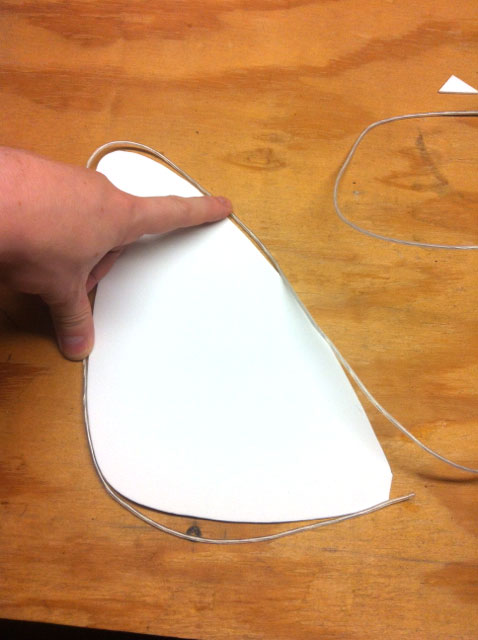
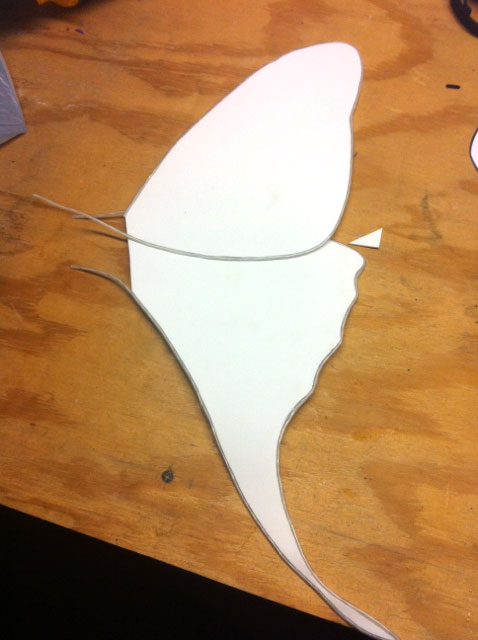
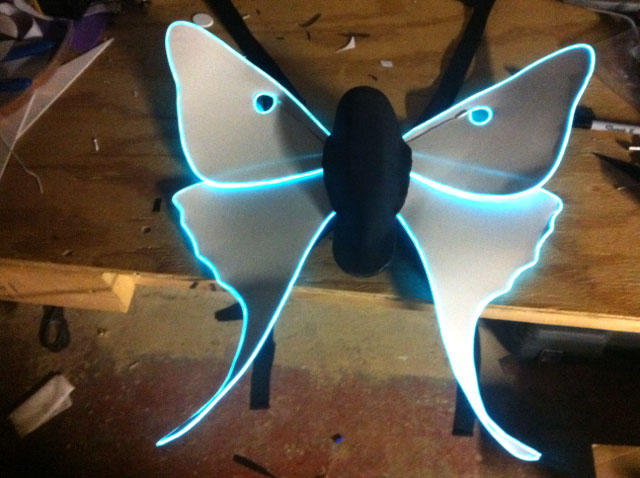
Now that you've got the foam all cut out, it's time to attach the EL wire. First you need to cut the EL wire to size. For the top wing one piece of EL wire can go all the way around. Just try to wrap some of the wire around the foam and give it an extra 3" or so on one side.
The bottom wing, due to the sharp point at the end (EL wire doesn't like sharp angles) needs to use two separate segments. Again, you'll want an extra 3" or so on each end.

The technique I've found works best for gluing the EL wire to the edge of the foam is to first apply glue to 2-3" of the edge of the foam. Then, lay the foam down on your work surface and push the EL wire into it and hold the two together for 15-20 seconds. You'll want to make sure to slowly slide the foam and EL wire as you do this to prevent any seepage from gluing your work piece to your work surface. Just keep applying glue a few inches at a time until you've attached all the wire segments to the foam.
Soldering the EL Wire
Now you need to attach some hook-up wire to each segment of your EL wire. If you haven't read the Lady Ada tutorial on soldering EL wire, do that now. You don't have a lot of room for error with the wings, so if you're new to working with EL wire, you'll want to practice a little bit before you try it for your wings. As you solder each segment make sure to test it with the driver. Once all of your electronics are covered in multiple layers of heat shrink tubing and foam it can be quite difficult to fix problems!
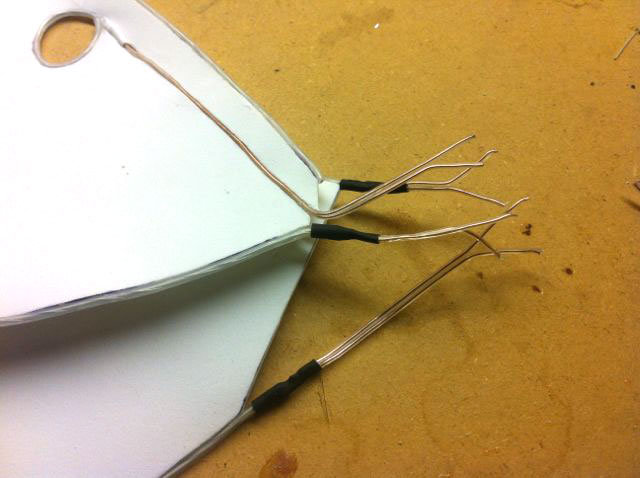
Once each segment has a piece of hook up wire you'll want to combine them together into a junction and attach a single new hook-up wire that will run to your driver. Since all this wiring will end up being inside the wings, the easiest thing is to solder all the wires together and cover the junctions in a larger piece of heat shrink tubing or electrical tape. I found it easier to not attach the connectors to the end of the wires quite yet.
OPTIONAL: Adding "eyes"
If you'd like a little extra challenge, you can try adding the "eyes" to the wings. You'll need to first cut a channel through the wing up to the eye. The channel should be wide enough to fit your hook-up wire and have a small section slightly bigger just before the eye to accomodate the heat-shrink tubing. Then cut out the actual eye.
Now you need to solder up and put heat shrink tubing on a small section of EL wire just as you did for the larger segments. This time make sure to use white heat shrink tubing so it blends in better with the wing.
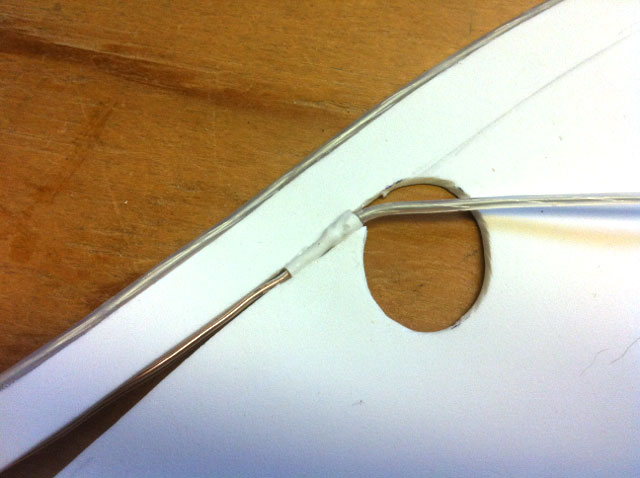
Next, glue the wire into place. I found starting with the heat shrink segment on one side, then gluing the wire worked well. Finally trim and glue the EL wire into place.

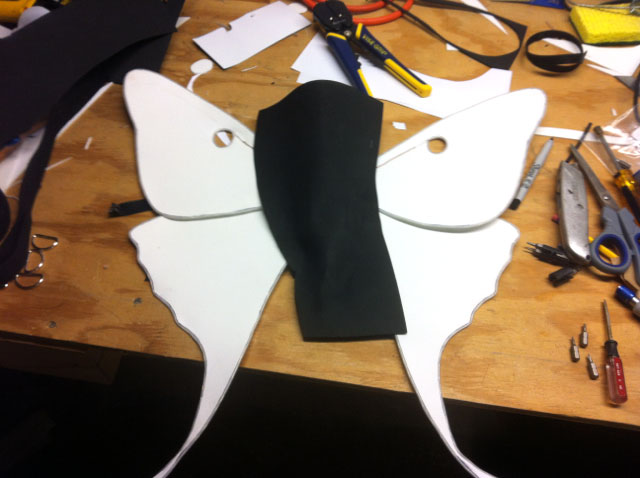
Attaching the body
Time for more super glue! First you want to lay one of the black body pieces on your work surface. Then lay out the wings on body, leaving about an inch on both sides. Then, trace around the edge of the wings so you know where they're supposed to go

Remove the wings, and one at a time lay down a bead of glue around the area of the body you just traced out. Then carefully glue each wing into place, starting with the bottom half of the wing and then glue the top half of the wing onto it.
Now cut a small slit in the middle of another one of the body pieces and feed your wires through it. Proceed to glue that piece into place by putting another bead of glue around the edge of the first body piece and then pressing the top piece into place. Now that your wires are fully contained, it's a good time to solder on the connectors.

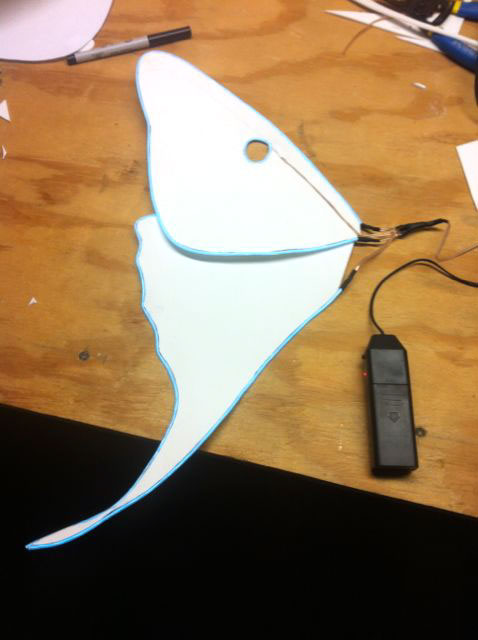
Driver Pouch
Now we need a place to put the drivers. Luckily the craft foam is very bendy stuff and we can literally form a pouch around our drivers. The first step is to lay out your drivers on the body to figure out where you want them.

This next bit is a little "messy", but it seems to work well. First you do is squirt a bead of super glue around the edge of the body (not the top though - you need that open to add and remove the drivers!). Then you press a left over piece of the black foam over the drivers and onto the glue. Slowly work your way around the body until the pouch is glued into place.
Next just carefully trim the foam until you have a nicely shaped pouch. As you can see I made mine flare up a bit at the top which helps to hide the drivers inside.

Attaching straps
Now that you have the actual wings, you just need to make a way to attach them. You could pin them or use velcro, but I'm fond of using canvas straps.
First you need to cut your 3 yards of strap in half. Then, lay the two straps out in an "X" on the flat size of your wings. You want to have approximately 12" of strap coming off the top. Once you're happy with the placement of the straps, trace around them with a pen or pencil, and remove them.
Now, as you did with the wings, lay down some glue and glue each strap into place. Once both straps are glued down, attach your last body piece over the straps to make a nice, neat package.
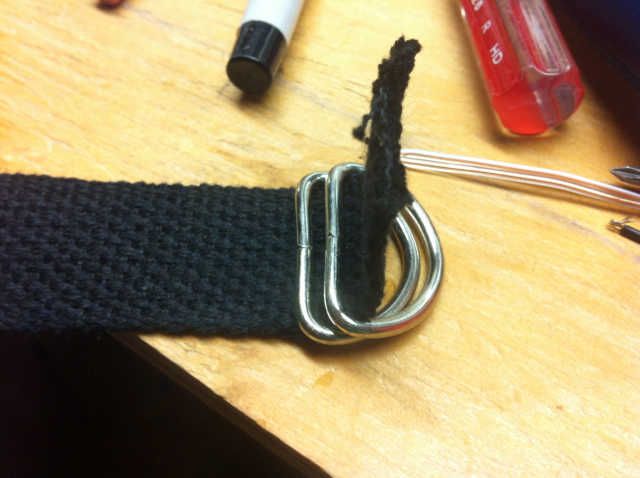
For a last step you need to attach the D-rings to the top straps. Just thread the D-rings through the strap and glue the strap to itself. You may want to do the same to the other end of the strap (just without the D-rings) to help prevent the canvas from unraveling.
Enjoy!
That's it, that's all there is to it!
Now, to actually wear the wings simply use the straps to hold them to your back like a backpack. Hold on to one of the top straps then grab the bottom strap for that side with your other hand. Pull the bottom strap through both D-rings then thread it over the top D-ring and under the bottom one. You now have an adjustable cinch. Repeat the process for the other side and check in a mirror to make sure they're on straight.
