
The wave shield is designed to play a very specific type of audio. If your music sample is in MP3 format, or 44KHz wav, you'll want to convert it to the right format. This way you will get the highest quality audio
If you have a wave file already, you should check to see if its already in a proper format. That way you will save yourself some time! In windows, right-click on the file, and select Properties then click on the Summary tab
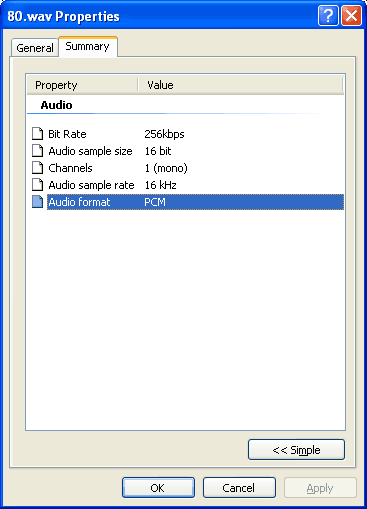
This file is 16KHz, 16-bit, mono PCM. Since thats below the maximum (22KHz, 16-bit, mono PCM) you are good to go. No need to convert the file
OK lets say the file is an MP3 or 44KHz or stereo wave file. We will need to convert it down. This is pretty easy. You can use the free Audacity software - available for windows, linux or mac
![]()
Grab it from the download page and install it on your computer
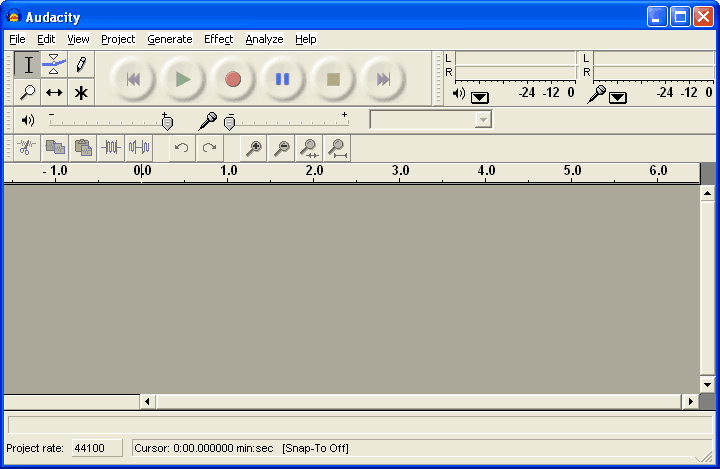
Start up Audacity
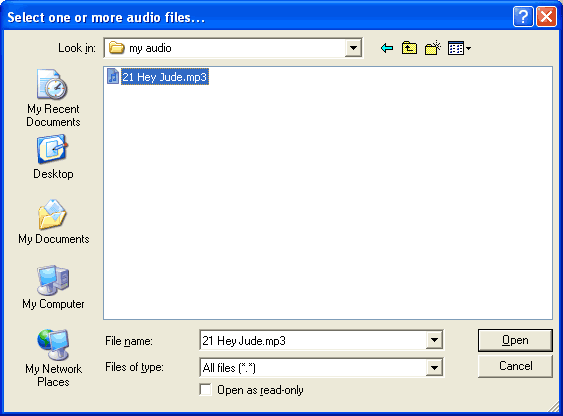
Select File->Open... and open the file. In my case its an MP3
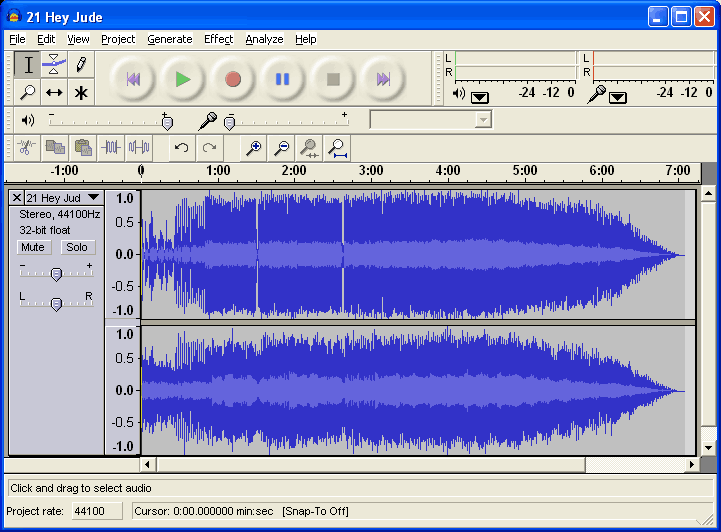
Audacity will spend some time uncompressing and opening the file and then present you with something like this
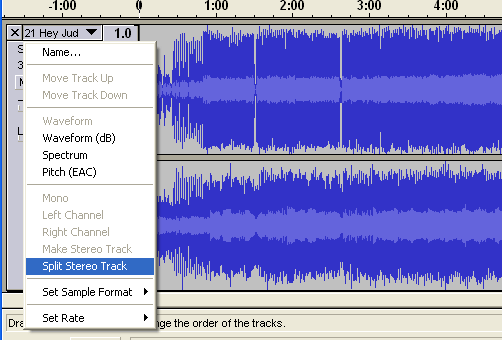
Next, if you have a stero track, you'll probably want to turn it into a mixed mono track. That way it will sound most like the original. Click on the title and select Split Stereo Track
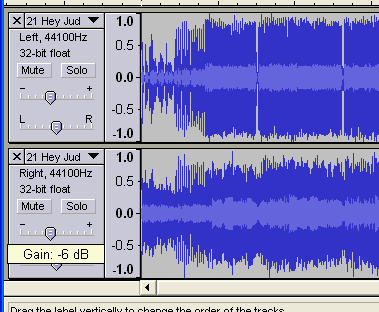
Next, when you mix a track you'll end up adding both of them together. This means that if both sides are loud, you'll get distortion. Reduce the gain on both tracks to -6dB
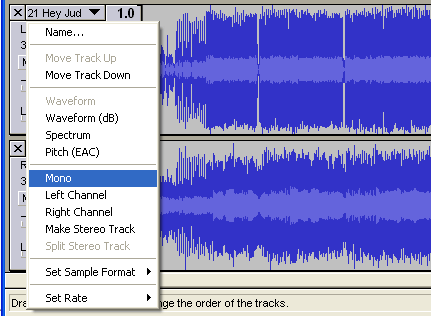
Then convert both tracks to Mono by clicking on each title. Make sure you do it for both tracks!
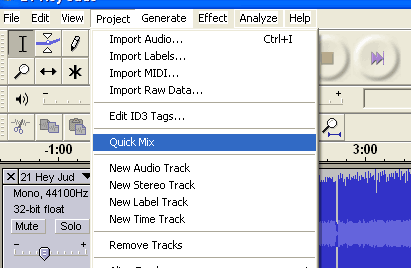
Now to mix! From the menu select Project -> Quick Mix
A few seconds later, you have converted your stereo track to mono!
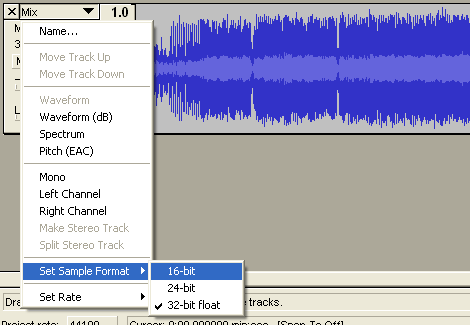
If your audio rate is higher than 16-bit, you will want to downconvert it. Click on the track title and select Set Sample Format -> 16-bit
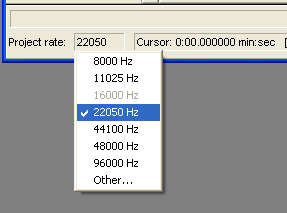
Finally, make sure the audio file will be saved as 22KHz. If the the track label says 44KHz you will want to convert it.
At the bottom of the window there is a little button named Project rate: Make sure this is 22KHz or less
Check the Preferences menu item and select the File Formats tab. Make sure the Uncompressed Export Format is WAV (Microsoft 16 bit PCM)
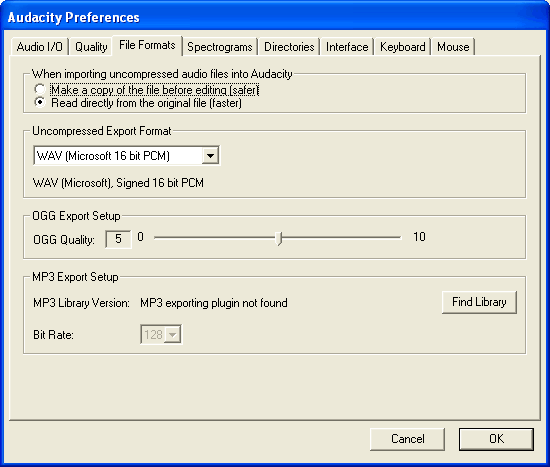
You only have to do this once!
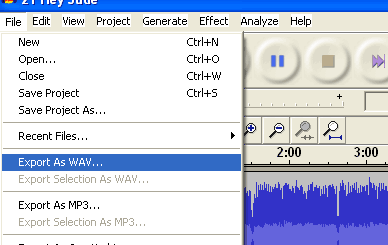
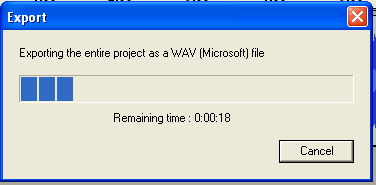
Finally, you're ready to export the file. Select Export as WAV... from the pulldown
It may take a few seconds to convert and save the file
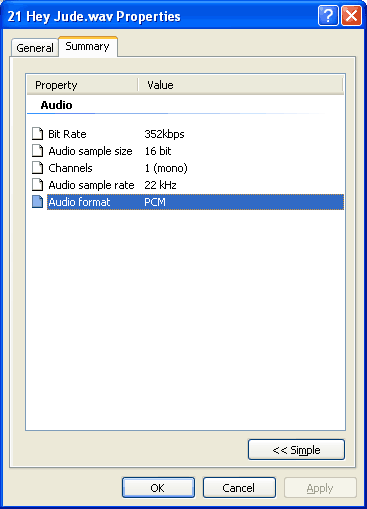
Finally, check the file Properties. It should be 16 bit, mono, 22KHz (or less) and PCM format
OK! Now you can go to the next step, which is formatting an SD card and copying files over