
The MIDIsense kit is still evolving, and I often add new features and fix any bugs that come up.
While you can use the MIDIsense kit as you received it, upgrading the firmware may provide you with new & exciting features!
Right now v1.2 is "stable" and is what kits are shipped with. v1.2 adds the ability to select which channel the sensor data is sent to as well as the ability to reduce MIDI bandwidth by only sending data when it changes.
You can download the latest firmware via the download page
Firmware is stored as a ".hex file", which is just a plain text file with hexidecimal numbers in it and a colon at the front of each line. Download the .hex file you want to program in by right-clicking (windows) or control-clicking on the link and selecting "Save link as...". Next, open the file in a text editor to verify it looks something like this:
:2000000012C02BC02AC029C043C027C026C025C024C0D6C022C0F3C620C01FC01EC01DC00C
:200020001CC01BC01AC011241FBECFE5D4E0DEBFCDBF10E0A0E6B0E0E0EBF0E102C0059093
although much longer (that is just a snippet) There should be no html, english text or other nonsense in there.
Open up the MIDIsense software and do not connect to the board. Select Upload firmware... from the menu
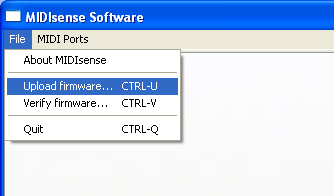
Next, select whatever file you want to upload

The following dialog will appear

Press cancel to quit. Otherwise, turn off the MIDIsense board and turn it on while clicking the OK button. This keeps people from updating the firmware by accident. If you dont get it the first time, just try again. Basically you must click OK between the orange LED blink and when the green LED blinking startss
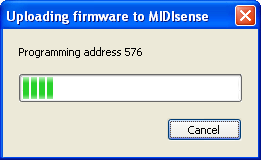
If you are successful, it will start the programming process.
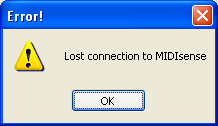
If something goes wrong, just try again! It's best to not do anything else while its uploading: go have a cup of tea or something. If you start messing with the computer it can make the software unhappy.
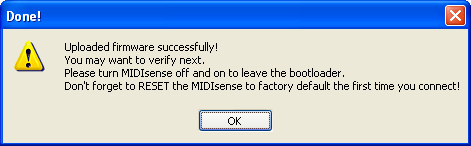
When its done you will see this box. Turn it off and on. The MIDIsense board will probably not seem to be working at this time (or working oddly) because it is still configured for the old firmware but now has new firmware so you must perform a factory reset (step 5).
Newer kits do an auto-verify but for some reason it doesnt always seem to work. Simply perform a verification after you've uploaded the new firmware (see below)
Power cycle the MIDIsense board (turn it off and then on) then follow the programming steps except this time select "Verify" from the menu instead of "Upload"
You must perform a Reset to make sure the MIDIsense board is in sync with the new firmware.
Power cycle the MIDIsense board (turn it off and then on). Connect to it using the MIDIsense software, then click the "Reset" button at the top of the screen
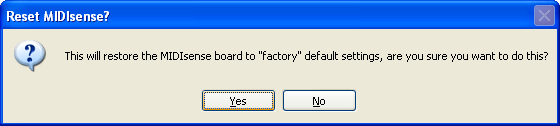
Click Yes and wait for it to upload the new settings!
Be sure to read the Settings chapter of the manual to see what has been added.